Showing posts with label Tutorial. Show all posts

Friday, April 3, 2020

White Tea Time - Side by Side

There were several white teas in my tea stash
and since I don't gravitate to white teas I had been avoiding them.
Yesterday I decided to do a side by side tasting of four of them.
Well I hadn't really had a good cup of tea yet that morning
and thought while stuck at home, why not!
I was up for the challenge!
 

There was Ceylon Gold (Ceylon) from teakruthi.com, Arya Pearl White first flush 2019 (Darjeeling region of India) from teagardinia.com, Shangri-La White from Miro Tea (Nepal), and Kumaon White (Himalayias, India) from youngmountain.com.

I always felt in the past all white teas were a bit bland, but tasting them side by side I
could definitely see the differences.  They were all good teas. I realized in tasting each
that it really depends on what your preferences are.
For the same reason that I struggle with green teas being too vegetable, 
I found this influenced me in my tasting of the white teas.
So my comments on each are determined by what I like or don't like.

My least favorite was the Arya Pearl White because it tasted too green and vegetable to me.
Next was the Kumoan White which on the canister said the flavor of cucumber/melon
and I would have to agree. Not so much vegetable, but still more than I prefer.
Third was the Ceylon Gold which was definitely richer even in color. A fuller bodied
white that held up best with consecutive steeps and more floral came out.
My favorite of the four was from Miro Tea. It was not sweet, but a lovely floral note.
This tea came from Nepal and is being developed by a tea friend, Jeni Dodd.
I would buy this one again.

I know many of you are not into tea as much as I am,
but I hope you enjoy my review.
It definitely is a way of learning what your preferences are
whether it is tea, coffee, or wine, even cheese or other food items like maybe chocolate.
Side by side tastings is one way of learning more.
Have fun and hope you take opportunity to do a side by side tasting
with something you particularly love.

Happy Friday, dear friends!
Have a terrific weekend of staying in place.
Enjoy comforts with JOY!

Friday, December 7, 2018

Gaiwan Style Tea

 Did you think I forgot my occasional posts on making tea?
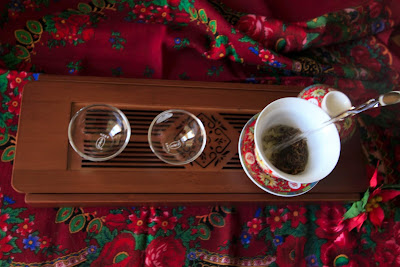
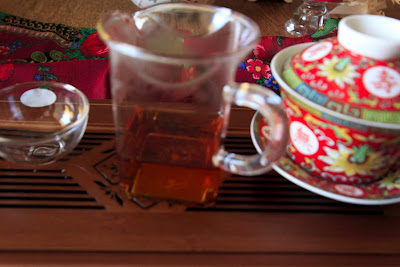
The cup that the tea is sitting in is a gaiwan.
Pronounce: Gai (guy) Wan (like wand only without the d) 
It is another form of Asian style of making tea.
It is fascinating that each way of making tea can make for a bit
different flavor.
 Pour the water into the gaiwan and cover with the lid.
You can shift the tea around in the cup with the lid,
then use the lid to keep the leaves in the gaiwan
when you pour into the cups or a pouring pitcher.
 In the gaiwan I had Jin Jun Mei from Harney & Sons.
A nice tea to try.
I probably don't use my gaiwan as often as I should or could,
but often when I taste tea with friends this is the way the tea is made.
The wood tray under the gaiwan has slots to catch any spills
in the tray below.
Often we rinse the tea leaves first, pour that off into the tray,
then make the tea.
When making tea this way you might use as much leaf as you
do for a large English style teapot, but you steep a shorter time
and resteep the leaves throughout the day.

To learn more you can check out the link here:
Believe it or not there are still more ways to make tea to be shared on another day.

Have a great weekend, dear friends!
Sip tea and enjoy quiet moments.


Tuesday, September 11, 2018

British Style Tea


Let's chat a bit.
Take a seat and I will pour you a "cuppa".
Imagine this chair is sitting by the fire in an English pub.
You order a pot of tea and dream awhile.

What would be in the pot?
It might be a bracing black English Breakfast or Earl Grey tea.
Would you add the milk first or after pouring in the tea?
If considering that, you must notice what your cup is made of.
Is it delicate?
How would it take to the cold then the hot temps?
Most often if the tea is made in a pot the milk is added to the cup before the pour.
But either way will work.
Now the milk situation is resolved, right?
How do the English make their tea?
Fully boil fresh water.
Pour into the pot to warm it a bit.
Pour that water out.
Now add a teaspoon of loose leaf tea for each cup of tea to the pot.
Pour in the freshly boiled water and steep for 1-5 minutes.
Yep! You want it to be strong.
Now get out the tea strainer and hold it over the cup as you pour.
With the loose tea still sitting in the pot steeping away
you might want to add more water to keep it from getting bitter.
The milk does tone down the bitterness too.
Then there is always sugar.
For some a little sweetener in the cup makes for a delightful cup of tea.

I drink my tea most often just straight (no calories there),
but in England I may also do as the English do.
A little milk to smooth the way for a beautiful day.

From time to time I will share how to make tea in various ways.
I bet you didn't know there was more than one way to make your tea.

The green enamel teapot recently came home with me in a bag no less.
Ha! It looked like it needed a little love and some bracing hot tea inside.


Friday, August 24, 2018

Peach Pie

 Today, friends, we will make a fresh peach pie.
My recipe book was totally worn out, especially the pie page.
Last year I finally took the book apart and put my favorites 
in plastic sleeves.
It was a wedding gift over 50 years ago
and the Better Homes and Garden cookbook that taught me to cook.
 OK, I have the dry ingredients together and ready to peel and slice the fruit.
All my tools are out on the counter ready to go.
 I measure the flour and salt in a bowl,
then comes the shortening.
I pour boiling hot water in the measuring cup with the spoon,
then after the cup and spoon are warmed up the water is dumped
and in goes the shortening.
If you don't know this little trick it is a good one for measuring
shortening and getting it out of the cup cleanly.
 Now the pastry blender is put to work, blending flour and shortening.
 All blended, now we move on.
 You see there is ice in my measuring cup,
it has been getting cold and waiting for me.
I measure out the water into the little cup nearby.
 And into the flour/shortening mixture it goes.
The fork works to do a bit of stirring.
 When the water seems fairly incorporated,
I knead the dough with my hands until it is in a ball.
 Separate the ball into two balls and flatten a bit.
Time to flour the board.
 The rolling pin is now rolling out one of the flattened balls
to desired thickness to fit in pie plate.
To transfer the rolled out dough you can either fold it in fourths
or wrap around the rolling pin and unroll over the pie plate.
 Fill with your prepared filling
and dab with a bit of butter.
Sometimes I forget the butter, but it still works.
 Cover with the second rolled out pastry ball,
scrimp edges or seal with the fork, then
trim off the excess dough.
My traditional design is a butterfly;
so there it is carved into the top.
Sprinkle with a little sugar.
 And into the oven it goes.
 While it is baking, I rolled out the excess dough,
spread with butter and sprinkle with a mixture
of cinnamon/sugar, then bake.
They are a yummy extra treat with a cup of tea.
 Both out of the oven now and cooling.
Ahhhhh! the fragrance is divine!
 And here you are!
One delicious peach pie and cinnamon sticks on the side.
Ready for the deliciousness with my cup of tea right now.
Recipe from Better, Homes and Garden cookbook, the one I follow
for a two crusted pie:
2 cups flour (I use unbleached and use the dip method of measuring)
1 teaspoon salt
2/3 cup shortening
6 tablespoons cold water

That's it folks!
Use with whatever filling you desire.
My #1 pie is Gravenstein apple
#2 is Marionberry
and from there could be whatever my heart desires.
I love making pies, a family tradition.

Happy Weekend, dear friends!

Wednesday, November 14, 2012

Sneak Peak - This Year's Card

 1.  Cut sheet of 8 1/2 X 11 inch paper in half to make 2 cards
2.  Fold paper up enough to form a pocket horizontally,
 then fold vertically to form three sections.

3.  Cut ribbon about 27-28 inches long.
4.  Lay the ribbon across the front of card and glue in place with
either a special flat ornament or sticker.  I found these sparkly little
ornaments at Michael's and just removed the string.
5.  After tucking special treats inside, wrap the ribbon twice around the card and tie a bow.

That's it, another simple idea for a card that anyone could make.

Now what will I tuck in the three pockets.
Some Ideas:
 bag of tea
 special picture
 quote you love
 Christmas poem
 personal note
 fill it with hearts of love
even pictures from recyled cards

Any other ideas?


Enjoy!

Tuesday, November 13, 2012

Make a Card - Recycle


Most years I make my Christmas cards.
Two years ago I saved the sleeves from all the chai I bought at a local beverage shop
and also saved the cards I received the year before.
Then where you see the large heart I used the
cards from previous years to punch a heart from their cards
and affix it to the opening of my card with the recycled sleeves.
When the card was opened at the seam
I wrote this message:
May your holidays be wrapped in the warmth of the season!
Any message from you would be welcome.

It's a simple, sort of silly idea; but I loved the idea of recycling to make my cards.
Do you make your cards?
I have received some beautiful homemade cards over the years,
but I tend to keep it simple and when possible recycle.
Enjoy this simple idea and let me know if you use it someday.

Thursday, November 1, 2012

Tutorial - Tea Wallet


Many of you know I sell sewing patterns for tea lovers at www.marmaladys.com
As we are heading into the holiday season I wanted to share a gift with each of you.
A tutorial to make a simple tea wallet or tote for carrying tea as you travel or to make as a gift.
Enjoy~

Cut 2 pieces of fabric (both the same or contrasting) 21 1/2" by 6 1/2"
Cut 2 light weight fusible pellon the same size. Make sure it is light weight,
otherwise it gets too bulky.
Iron on the fusible pellon to the back of each piece of fabric.
Note: My corners are already trimmed as I used a quilt batting the first
time around and found it wouldn't work.  Please trim the corners later after sewing the seams.

Cut 3/8" wide ribbon 36" long.
Fold in half and tuck inside the two layers of fabric with the fold peeking
out of cut edge just a little (see in picture on left), place 2" above bottom edge.
Then pin about a 2-3" space on the long edge as I have pinned at top.

Now sew a 1/4" seam allowance all around, except between the two pins.
Now trim corners at an angle and turn through the space not seamed, so you see the outside of fabric.

Make sure the corners are all the way turned and pointed in shape.
Press, then stitch the opening in the seam closed.
 Turn the long edge up 2" and press.
Also stitch the turned up ends closed (see where my thread is on left)
 

Stitch the turned up long side in place approximately every 3" creating
7 pockets.

Tuck teabags, packets of sugar, or other treasures in the pockets.
 
Roll and tie with ribbon to close.

This is my gift to you.
Happy First of November!